| Back: Making the Sketch Blue | Home | Next: Inking |
| Al's Photoshop Tutorial | Old Course (Versions 4.0 through 6.x) |
When you start to Ink this picture, you may want to be able to make the sketch be able to disappear and reappear at your command, to check how it would look without it without having to delete it. Layers are good for this. Layers are good for many things. Layers are your friends.

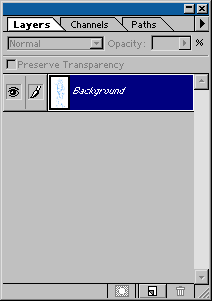
There should be a Layers window like the one shown to the right somewhere on your Photoshop screen. If not, it can be called from the menus (Window » Show Layers). The basic idea behind layers is that you can have many different elements to the picture you're working on stored on different planes, kind of like how a frame from a cartoon can be made from several separate drawings on acetate put on top of a background drawing. These layers can be moved around or turned visible and invisible without effecting other parts of the image. Transparency and shading tricks can also be done with these layers, but I'll go into that when we get into shading and effects.
So, what we want is to have a white background and be able to turn the blue sketch on and off over top of this, and then create a layer to Ink in on top of the sketch. Here's how we do that:
Notice how our sketch is labeled as "Background" in italics? That means that it is a solid image and cannot do transparency or other fun layer tricks. So, let's make a duplicate layer that can. To get to the layer menu, click on the box with the black triangle in it that is in the upper-right of the layers window. A menu should pop up there. Select "Duplicate Layer..." in that menu. A requester should pop up, asking for the layer name and the target for the new layer. Change the layer name from "Background Copy" to "Sketch", but leave the target alone, since it defaults to making the copy in the current image.

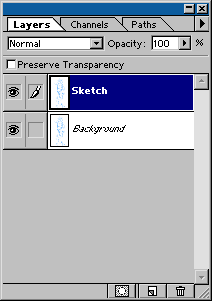
The layers window should now look like the one to the left. Always remember that the layer you're working on is the one whose title is highlighted in blue. If you ever don't see the effects of your actions, be sure to check what layer you're editing, because most actions are only applied to a single layer.
Click on the Background layer. We're going to turn this layer white, which is a simple operation. Just go to "Edit » Fill..." in the menus, and then make sure its settings are "Use: White", "Opacity: 100%", and "Mode: Normal", then click OK. Now when you turn the Sketch layer's visibility on and off with the icon that looks like an eye located to the left of its name, you should see it appear and disappear from the white page. Notice that if you have both layers invisible, you get a sort of checkerboard pattern. This is Photoshop's way of indicating that something is transparent.
Finally, it's time to make a layer to do the inking in. In the layer window menu, select
"New Layer..." Change its name to "Ink". You should get a new layer with nothing
in it in your layers window. Click it, and drag it up to the top of the list, making
sure it is above Sketch and Background.
| Back: Making the Sketch Blue | Home | Next: Inking |