| Al's Photoshop Tutorial | New Course (Versions 7.0 and above) |
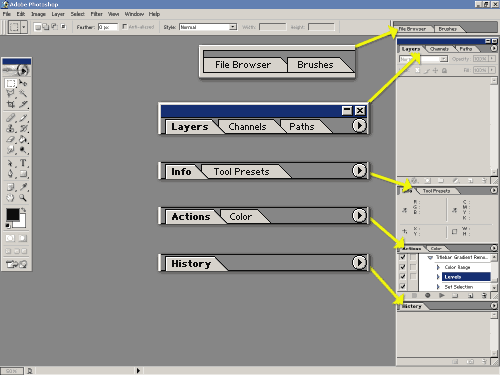
Before we begin, let's take a moment to examine the new interface on Photoshop 7.0. Below is a screenshot of how I have mine set up. The tiny windows on the right are very important. I like to always have lots of room for the Layers window, and always have the History window visible for correcting mistakes. You can rearrange these windows by dragging their tabs around. As you use Photoshop, you'll discover what tabs are most important to the way you use it, and you can place your tabs accordingly.
Returning Photoshop users are bound to have a few questions about this interface, such as "What happened to my beloved airbrush?" and "Why in God's name do they completely change the keyboard layout with every version?" Don't be alarmed. There's a powerful new brush system in place that lets us do some cool new things. We'll get into that when we cover inking and coloring. And they keep changing the keyboard layout because they hate their customers.
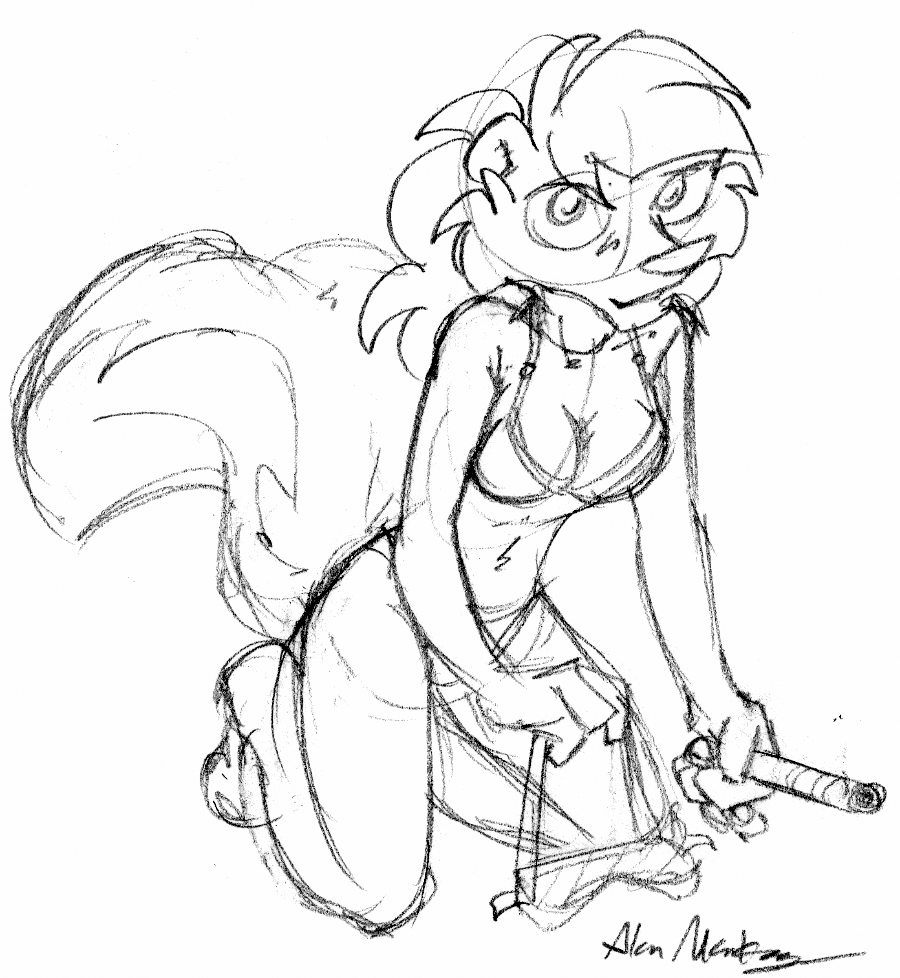
OK, let's get started! I'm not going to offer any real help here on getting a sketch done, of course. There are plenty of artists' tutorials out there to help you with that. But once you've made or found a sketch you wish to use, or if you want to work with my sketch to the right here, we can proceed.
The image to the right is the sketch I'll be using in this tutorial. Those of you familiar with my work may recognize the character, since she's one of my first, named Moufette that I first drew over ten years ago. You can see the full-resolution version of my sketch by clicking on it. You'll notice that it's fairly large (900 by 978 pixels). This is the resolution I'll be working in while I color this piece in Photoshop. I think it is good practice to work on a resolution that is higher than you'll need in the end, especially for screen-resolution images. The tiny errors that inevitably occur will be easier to correct in the higher resolution, and those small ones that do slip by are less visible when shrunk to screen-resolution.
If you're importing a sketch from paper to use, the best way to get it is with a scanner. These days, scanners are fairly cheap, fast, and high-quality, so if you're a serious aspiring artist, there's no reason not to have one. Scanners usually come with their own software for scanning, which can communicate with other programs through a protocol called "TWAIN" (which stands for "Technology Without An Interesting Name." No, really, it does!).
If your scanner has its TWAIN-compatible software properly installed, you should see its name in the list in the "File » Import" menu. Select it to launch the scanning software. Although every scanner manufacturer's software is different, it's usually roughly the same experience. The software will immediately start making a preview of what's on the scanner bed, and then you can select a region of it to scan. Look for a way to specify what type of image it's scanning. If you're just scanning a graphite sketch, it's better to scan it in grayscale rather than full color. Also look for a way to specify the DPI (Dots Per Inch resolution) that it scans at. You might want to set this fairly high, like 200 or 300. If it's too big, you can always shrink it with "Image » Image Size".
Once you have your scan, don't forget to save! Use "File » Save As..." and be sure you're saving it in the Photoshop (.PSD) format.
| Back: Home | Next: Making the Sketch Blue |