| Al's Photoshop Tutorial | New Course (Versions 7.0 and above) |
Step 4-C: Path Inking
This method if inking can seem pretty intimidating at first. It can seem like a horrible,
technical, time-consuming and complicated process. But, once you
get a good sense of how to use the Pen tool, it really does come in handy, plus the
lines it makes can be pretty much flawless. Again, before starting, be sure the Ink
layer is selected, not the Sketch layer. it's easy to forget about layers and start
working on the wrong one.
The two tools we'll be using are the Pen tool (the first tool in the bottom-left of the
third batch of icons in the tools menu) and the Direct Selection tool (the second tool
in the icon directly above the Pen tool). We'll be using the Pen tool to draw points
and the Direct Selection tool to modify them.
The lines you are editing are stored temporarily as Paths. Take a look for the Paths
window (Window » Show Paths). These paths are how the computer thinks of the lines when
they are made of anchors and curves, before they are set into pixels.
 |
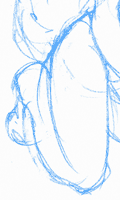
This is the section of the sketch I'll be working with. If you haven't already done so,
be sure you have the brush you want to ink with set up in the Brush Tool. When it comes
time to draw our paths, it will draw them with this tool. Select the Pen tool now. Up in the
tool options bar, you'll see some icons. First, there's the preset icon, and then a batch of
three. These three control what kind of shape we're making with the pen. We want to make a
path, so select the middle icon. To the right of these, make sure the regular pen tool is
selected.
|
 |
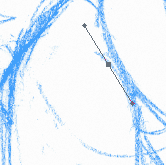
Clicking down places an anchor point. If you drag the mouse a little while the button
is still down, you can set its starting direction. Not specifying a starting direction will make
the path jump directly towards the next point you make, so this direction line is how you go about
making curves. Here you see the anchor point(the grey box) and the line showing its direction,
which also shoots out at an equal distance on the other side of the anchor. If you've put your
anchor in the wrong place, you can hit the "Delete" key to get rid of it.
|
 |
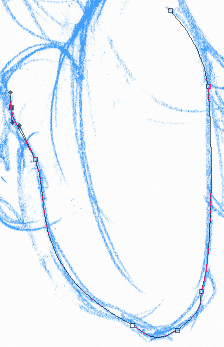
Now I have set up more anchor points and angles to complete the line I'm working on. Once
all the anchors are placed, we can go back and fine-tune them. Select the Direct Selector tool
and zoom in. The selector may select the entire path when you first click on a point, so instead
click a little farther away from a point and drag to draw a selection box around it. Then you can
move the anchor and both the ingoing and outgoing curve vectors. This method of curves is very
flexible, so take your time and make sure your curve is perfect. Then you can open the menu on the
Paths window and select "Stroke Path". A window should pop up. Make sure that the Tool selected in
this window is "Brush", and "Simulate Pressure" is not checked, and then hit OK.
|
 |
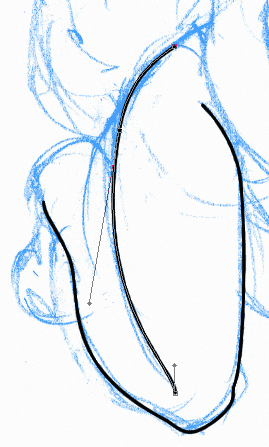
The "Stroke Path" command should have just inked the path you were working on. Now you can get
rid of the path (either by selecting all the anchors and hitting the Delete key, or by selecting
"Delete Path" from the Path window) and work on others. In this screenshot, I've just stroked
a second path. Just like with freehand lines, we can go back and taper the edges later if we want to.
|
Sometimes you'll have a long line that's broken by something in front of it. In my picture, for
example, the other leg is partially obscured by a strap from the diving mask. For situations like
these, it's a good idea to ink the part on top, make a new layer, and ink the entire long line on that
one. Then you can go back and erase the part of the line that's obscured without worrying about deleting
any of the other lines, and then merge the layers together.
Keep in mind that while the pen tools method is good for the long, important
lines, it should not be used for every line in the picture! It could be, but if your
pictures tend to have many small lines like mine, you would simply be driven insane.
These small lines don't need the detail of the longer ones, so you would be better off
drawing them freehand, even with a mouse, to draw them.
Of course, if you have the means, I highly recommend buying a digital drawing tablet so
more of the lines can be done freehand. But, even with my tablet, I find myself coming
back to the Pen tool method for the long lines, usually the ones in the arms and legs.
