
| Al's Photoshop Tutorial | Advanced Concepts |
Up until now, we've been using the circular brushes that Photoshop creates. It's also possible to create brushes from bitmaps. We can use this to make a brush with many points, which lets us draw lots of strands of fur at once. We start with a new, white, very small image, and we use a small brush to draw a small group of dots, like this:
Select your dot group with the rectangular marquis, making sure you don't select too much of the surrounding whitespace, and go to the Brush Palette window. On this window's menu, you should see an option called "Define Brush", which adds your selection to this palette. Once it's made, it will stay in there. You can even save and load sets of your brushes.
The size of the dots controls how thick the resulting hairs will look. Having more dots will let you draw more strands at once, but will take away your ability to control detail. The shape of the array of dots can be used to get a specific effect. For example, a fan-shaped array of thick dots can be used to make excellent Bob Ross style happy trees.
Returning to the matter at hand, the first step towards making thick-looking
fur is to give it a normal-style shading job with the airbrush. This flat
shading will give the general feel to your fur eventually, so this is an
important step.
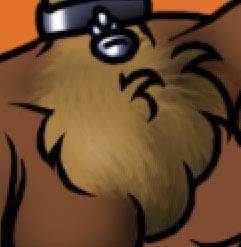
Now we select the smudge tool, either with R on the keyboard or by clicking on the icon that looks like a finger pointing downwards. Be careful and check the smudge tool's options window first. "Use All Layers" and "Finger Painting" should both be off. The pressure you use affects the look of the length of the fur. If you have a good drawing tablet, reading stylus pressure is also a good idea. Otherwise, don't have pressure at 100% or your hairs won't look tapered. Also make sure the layer's "Preserve Transparency" is turned on, so you don't mess up the edges.
Drawing with the smudge tool is a lot like brushing the hair. You should use
flowing strokes in the hair's direction. You can always add more darkness or
lightness as needed with the airbrush in the middle of this process. You can
use this on the shade and highlight layers, and even the soft color layer to
add more realism. With the soft color layer, you should do it with
"Preserve Transparency" turned off, since you're dealing with differences in
transparency instead of darkness and lightness.

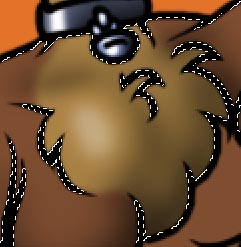
Here's a more zoomed-out view of the image. In this one, I've shaded the
rest of the body and gone quickly over the thin fur with a group of thinner
dots. In the next step, I'll do the hair, which follows pretty much the
same procedure for shading, but gets some serious shine added to it as well.
| Back: Simple Detail | Home | Next: Shiny Hair |