Ink is off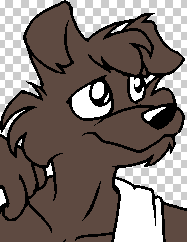 |
Ink is behind color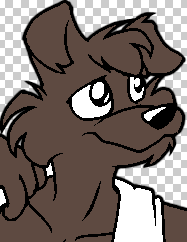 |
Ink is in front of color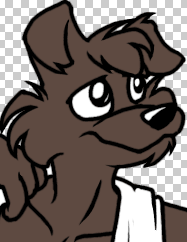 |
| Back: Getting Ready to Color | Home | Next: Soft Color |
| Al's Photoshop Tutorial | Old Course (Versions 4.0 through 6.x) |
You should know about the color selector already. If not, it was described along with the toolbox back in the basics page.
This is another artistic bit, but there is no need to use a Drawing Pad here. In fact, I would recommend using a mouse for this part even if you do have a Pad, since mice are generally a lot easier on the wrists, and we'll just be dealing with large chunks of color and some minor pixelpushing.
Start by selecting a commonly-used, flat base color of something in your drawing. In this example, it will be the wolf's fur, whose base tone will be a dark brown-gray. Select the fill tool, and make sure that on its options window, "Anti-aliased" is not checked, its mode is normal, and its opacity is 100%. Now just start filling in some of the proper areas. But there are two dangers to look out for:
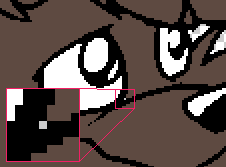
Stray Pixels: There are some small areas that may be isolated from the bulk
of the colored areas. Do not simply fill them in, because they will still be separated
and won't work well with shading and other steps down the road. Use the Pencil tool
with a single-pixel brush (and do this zoomed WAY in) to connect them to the rest of
the area with the same color you filled with, or seal them up with black. The stray
pixels are, however, very minor errors that would probably be overlooked by almost
everyone in the final piece.
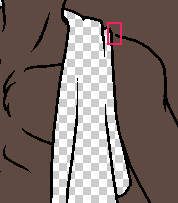
Gaps: Now these are dangerous. If there is a gap in one of the lines surrounding the area you're trying to fill, the color you're filling with will spill out into adjoining areas. The first step to treating these is to undo the fill! Then, look for the offending gap in the borders, and fill it in with a black single-pixel pencil. Try again, but large areas may have many gaps.
A note on layers: Now that we have something meaningful on two layers, we can see
the nature of it more easily. Take a look at the three images below. The one on
the left has the ink layer invisible, all you see are the jagged edges of the color
layer. The one in the middle has the ink layer on, but it is behind the color layer.
There are smooth edges between the character and the background, but not where there
is color. If this is the case, we simply go to the layers window and drag the Ink
layer above the color layer. We should get something like the image on the right,
where all lines have smooth edges.
Ink is off |
Ink is behind color |
Ink is in front of color |
| Back: Getting Ready to Color | Home | Next: Soft Color |