| Back: Backgrounds and Effects | Home | Skip Ahead: Advanced Concepts |
| Al's Photoshop Tutorial | New Course (Versions 7.0 and above) |

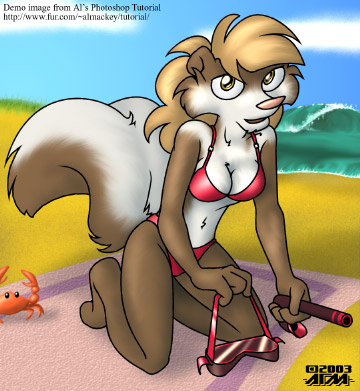
Well, would ya look at that, we've got a completed picture. There's one small problem: It's a 6.2 megabyte, 900 by 978 pixel Photoshop image. How do we make it a nicely sized image like the ones I've been using on the sides in this tutorial all along?
We're going to make a copy of our image in memory to save in a distributable format. Do "Image » Duplicate", and give it any old name, and check the "Duplicate Merged Layers Only" option. When you hit OK, a copy of your image with everything merged onto one layer will appear.
Now go to "Image » Image Size". A good rule of thumb for images distributed by Internet is to never exceed about 800 pixels wide or 600 pixels tall, unless you're making a backdrop. This limits the size nicely, and your final output size should be more manageable. Don't worry about the "Document Size" settings when making something for web. That's mostly just for setting the DPI for printing, and won't be saved in your file. If your artwork, like mine, has a lot of linework, you might be better off using "Bilinear" under resample image. If your artwork has a more natural look, "Trilinear" may be better. The reason for this is that sometimes, bright edges will show up around black lines when resizing with "Trilinear", but it has a less harsh look on normal edges than "Bilinear".
There are many image formats widely in use today, and each format has its own
advantages and disadvantages. Most formats use some sort of compression, which gives
the advantage of smaller file size at the expense of image quality.
Anyway, let's get back to the duplicate image you're about to export. We're not going to use the "Fine » Save As", because that embeds a color profile in some file formats, including JPEG, which is about 10K or more of data that really doesn't need to be there. Instead, we're going to use "File » Save For Web".
An interface will appear with your picture in it. Be sure the tab selected at the top is the one that says "Optimized". With this tab selected, we'll be seeing in the window what the final file will look like. Don't mess with the image size tab, since this we've already resized the image. Sometimes doing it through that tab can be intolerably slow. Take note of the file size in the statistics below the image as you adjust the quality slider. There's no reason for a reasonably sized image to be over 200KB. Save the file, and we're done!
By the way, for anyone who'd like to see the inner workings of my demo picture and has lots of bandwidth to spare, I'm making both of its entire final Photoshop files available here. It was made on Photoshop version 7.0 for PC, but works equally well on Macintosh, and also should work in future versions. It's compressed, so you'll also need a program like Winzip to unzip it.
| Back: Backgrounds and Effects | Home | Skip Ahead: Advanced Concepts |